On the fringe
The upside of a fringe is that there’s no need to fret about frown lines or should-you-shouldn’t-you Botox; the downside is they grow at a rate of knots…

When my fringe reaches Dynasty’s Crystal Carrington proportions (fringe plus strange wing bits) I know action is needed, but scheduling a trim that requires childcare negotiation and petrol seems so unnecessary.
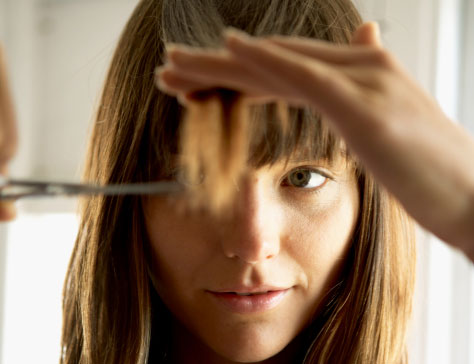
Having too often returned from impulse salon visits mentally checking off the calendar months before a fiercely pruned fringe will once again reach my eyebrows, I decide that I can (and will) cut it better than a hairdresser myself. Armed with a pair of Boots Professional Hairdressing Scissors, £7.50, and a trusty YouTube tutorial playing on my laptop I set about the task – ignoring my husband sucking air through his teeth like a builder sizing up a particularly tricky job.
Following the instructions I achieve a fairly impressive result and, confidence boosted, move on to the texturising technique shown to reduce the weight of a bulky fringe. The overall effect is slightly shorter than I wanted but – if I do say so myself – much better than many of the professional cuts I’ve paid for and subsequently cried ‘why, why, why?’ over. In these cash-strapped, time-starved times, DIY beauty treatments offer fun, function and a surprising amount of satisfaction. The morning after fringe-gate a friend comments on how neat and ‘now’ it looks. ‘Oh, just a little something I did myself,’ I reply with a smug smile.
Styling Tips
• Ensure the blades of your scissors are clean and dry.
• Never cut a fringe without tying the rest of your hair back. You could cut it too wide or, worse still, accidentally snip into the side lengths.
• Start by cutting off a small amount – better to lose too little than too much.
• The most flattering fringe is slightly shorter in the middle and longer at the sides.
• To give texture and shine apply a styling balm that locks out frizz-inducing humidity – try John Frieda Frizz Weather Works Style Sealant Crème, £5.99
• Use a hairdryer with a nozzle on a low speed setting and tousle with your fingers for a flatter result or wrap over a medium-sized round brush for a curved effect.
• Finally, remember a fringe generally looks better a week after it’s been cut, when it’s had time to settle.


